“Hearst Magazines and Yahoo may earn commission or revenue on some items through these links.”
From simple painting projects to more complex household DIYs, crafting can reduce stress and boost creativity. While you might automatically think of kid-friendly materials like tissue paper, popsicle sticks, and pipe cleaners when it comes to crafting, there are plenty of genius adult craft ideas and fun upcycling projects that are a bit more complex.
Whether you’re hoping to create DIY home decor, personalize a homemade holiday gift for a friend, or simply stimulate your mind with a fun new project, crafting is the way to go. While we’ve included a few more complicated crafts on this list, there are plenty that can be done in just a few hours—or even minutes—with materials you might already having lying around the house.
Keep in mind, these craft projects are intended for adults, but if you want to get your little ones involved, explore our list of crafts for kids. And if you’re looking for seasonal craft ideas, we’ve got you covered with our roundups of summer crafts, fall DIYs, and even homemade Christmas decorations.
Flower Fabric
Flower pounding is a unique way to preserve a special bouquet without actually holding onto the flowers afterwards. Customize any tablecloths, napkins, or decorative towels by pounding the flowers (with a piece of wax paper on top as a barrier) with a hammer onto the fabric of your choice.
Get the tutorial at The House That Lars Built »

The House That Lars Built
Floral Wreath
Transform a boxwood wreath with just a few dried flowers for a simple yet elegant DIY. Use hot glue to attach larger flowers, then tuck in the smaller ones throughout.

Mike Garten
Stitched Floral Purse
A vintage purse for a portion of the price? Count us in! This blogger transformed an $11 bag into a stitched floral masterpiece in just a few days.
Get the tutorial at A Beautiful Mess »

A Beautiful Mess
Crystal Ball Centerpiece
Create a crystal glowing ball with just a round glass vase and some LED fairy lights. Once the lights are inside, turn them on to complete the look.
RELATED: 75 Best Halloween Crafts for Kids

Mike Garten
Paper Mache Clay Pedestal Bowl
DIY your own paper mache fruit pedestal bowl for a vintage look everyone will love. You’ll need paper mache clay—or if you’d prefer to make your own, this blogger includes step-by-step instructions.
Get the tutorial at A Piece of Rainbow »

A Piece of Rainbow
DIY Tulipiere
A tulipiere is a tiered vessel used for flower arranging. To get the vintage-inspired look, simply stack flat-bottomed vases of various sizes inside each other. Fill each layer with water and freshly cut flowers.

Mike Garten
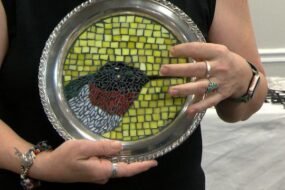
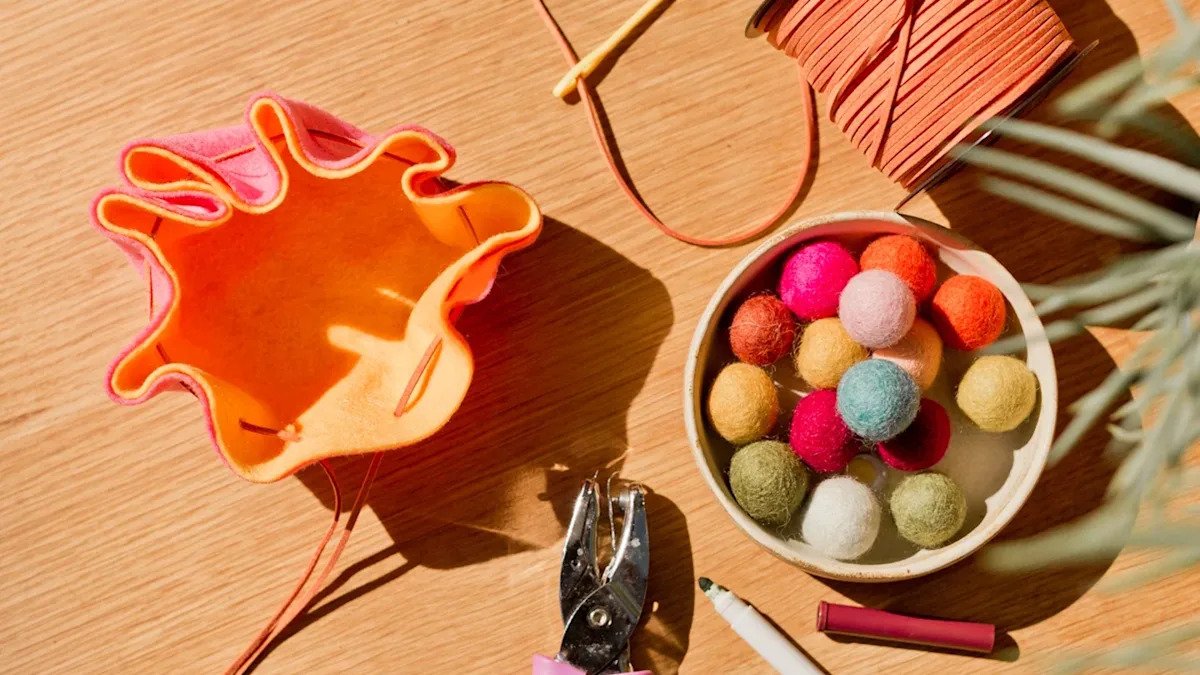
Drawstring Pouches
Get organized (and creative!) with this colorful drawstring craft. Whether you need a pouch for coins, jewelry, or craft supplies, this quick craft results in a practical end product. You can even make a larger one as a purse if you desire—no sewing required!
Get the tutorial at Paper & Stitch »

Paper & Stitch
Mason Jar Desk Organizers
Unorganized desks can be overwhelming. Thankfully, there’s a craft for that. Simply decorate mason jars with wrapping paper and label them with whatever you plan to store inside. It’s that simple!
Get the tutorial at It All Started With Paint »

It All Started With Paint
Cup Wraps
If you’re part of the cup craze, you’re definitely not alone. Instead of purchasing predesigned glasses, why not make your own? This blogger transfers patterns of her choosing onto tumblers and mugs. You can even accessorize plain cups or glasses you already have lying around.
Get the tutorial at Happiness Is Homemade »

Happiness Is Homemade
Leaf Imprint Jewelry Dish
Collect a few cuttings from your favorite houseplants or neighborhood trees, then use them to create beautiful jewelry dishes. The hardest part is rolling the imprint onto air dry clay using a rolling pin.
Get the tutorial at Sprouting Wild Ones »

Sprouting Wild Ones
Floral Stencil Tote Bag
Turn a solid tote bag into a one-of-a-kind accessory with a few floral stencils and acrylic craft paint. You can also invest in alphabet stencils to spell out an inspirational message or name of a loved one, like “Mom.”
Get the tutorial at Sarah Hearts »

Sarah Hearts
Rose Petal Bath Salts
Turn your bathroom into a luxurious spa by making your own bath salts. Not to mention, this recipe will give your dying rose bouquet a second purpose!
Get the tutorial at Paper & Stitch »

Paper & Stitch
Rainbow Doormat
Every time guests step through your charming entryway, you can point out your handcrafted doormat. All you need is a natural coir mat and a few outdoor acrylic paints, plus paint brushes to draw on the design!
Get the tutorial at Make and Takes »

Makes and Takes
Colorful Jenga Game
Give this classic wood game a colorful upgrade! Using small foam paintbrushes and acrylic paints, simply paint the sides of each Jenga block. It shouldn’t take longer than 30 minutes.
Get the tutorial at Lovely Indeed »

Lovely Indeed
Paper Flower Gift Topper
Whether it’s for a birthday or special holiday, these striking paper flower toppers make any present feel more personal. Once you nail it, you’ll use this easy paper folding technique all of the time!
Get the tutorial at The House That Lars Built »

The House That Lars Built
Mid-Century Modern Side Table
Most mid-century modern side tables cost at least $100—but this DIY option is way less. There’s even a round cake pan, which can be painted any color of your choice, that provides hidden storage.
Get the tutorial at Sugar & Cloth »

Sugar and Cloth
Rainbow Bangles
Let your imagination run wild as you paint and stencil your favorite patterns onto wood bangles. They’re so fun to wear knowing you’ve made them yourself, but you can also paint one for a friend.
Get the tutorial at The House That Lars Built »

The House That Lars Built
Pressed Flower Lanterns
Decorate your home with these gorgeous flower lanterns — or make them in bulk for an upcoming party. You can definitely press your own flowers, but save yourself time by picking up a pack online.
Get the tutorial at First Day of Home »

FIRST DAY OF HOME
Cubby Cabinet
Inspired by vintage apothecary cabinets, this farmhouse wall shelf costs less than $15 to recreate. Dress it up with everything from seasonal decor and office supplies to vintage trinkets.
Get the tutorial at A Piece of Rainbow »

Ananda Yankellow
Bumble Bee Bookmark
Bookworms will adore marking pages with this smiling bumble bee bookmark. Plus, this tiny craft is a great way to use up any felt scraps you have lying around from previous projects.
Get the tutorial at The Craft Train »

The Craft Train
Colorblock Vase
With a bit of spray paint and painter’s tape, this homemade decor project is a breeze! The hardest part will be deciding what color to paint your flower vase.
Get the tutorial at Lolly Jane »
RELATED: DIY Home Decor Ideas for Instant Personality

Lolly Jane
Floral Candles
Decorate taper candles to make your home more inviting, especially if you’re hosting a party. For this craft, we used paint markers (acrylic paint works too) for the floral designs.
Follow these steps:
-
Use a clean cloth to wipe the candles with rubbing alcohol. This will remove lint and debris for a smooth surface.
-
Use paint markers or craft paint to draw a series of dots, flowers, and patterns.
-
Work on one side and let it dry completely before moving to another side.
RELATED: Easter Crafts for Kids and Adults to Try

Mike Garten
Easy Landscape Painting
Love painting, but you’re not a painter? Follow this step-by-step video to make a masterpiece with ease. Display the final result in a thrifted picture frame, and you’ve got yourself a truly one-of-a-kind creation.
Get the tutorial at Bless’er House »

Bless’er House
DIY Lavender Soap
Give yourself permission to use the fancy soap… by making it yourself. You’ll need just a few supplies: goat’s milk melt and pour base, dried lavender, lavender oil, and silicone soap molds.
Get the tutorial at It All Started With Paint »

It All Started With Paint
Tassel Earrings
Here’s an adorable craft idea that’ll take less than five minutes. You’ll need a few supplies, including silk tassels, gold end caps, and earring hooks to create these unique earrings.
Get the tutorial at Tell Love and Party »

Tell Love and Party
Decorative Pinboard
Create a personalized or seasonal display by hanging photos, greeting cards, and your favorite artwork from an old window frame. Add small bulldog clips with a hot glue gun to complete the vintage-inspired look.

Kaley Elaine Photography
Accordion Paper Flowers
Green thumb or not, you can still grow an everlasting garden. Download these templates and follow the steps below to make paper flowers in various shapes, sizes, and colors.
-
Cut out four pieces of yellow or white paper (depending on what color daffodil you would like) using the first template.
-
Fold the paper in half both vertically and horizontally and open again. Fold the bottom up about ¼” and crease it down.
-
Flip the paper over and fold all the way to the top until you create an accordion.
-
Fold the accordion-folded paper in half and attach the two middle pieces together with double-sided tape.
-
Repeat steps 2-4 with the remaining three pieces of paper.
-
Connect all four together with a strip of double stick tape to create a flower shape.
-
Cut out a rectangle of orange paper about 2″ x 1.5″ and cut little points on one of the long edges.
-
Roll the rectangle loosely to make a tube shape and connect with a small piece of double-sided tape, folding the bottom edge down to create a flat bottom. Glue the little cup you made into the center of the flower to finish your daffodil.

Mike Garten
Colorful Coupe Cocktail Glasses
Make these eye-catching cocktail glasses with just a bit of scrap adhesive vinyl and cheap glasses from Ikea or the dollar store. This project is super easy, but will create a dazzling result your cocktail party guests will be sure to admire.
Get the tutorial at A Kailo Chic Life »

A Kailo Chic Life
Woven Coasters
Burlap coasters add a layer of texture and warmth to a display, all while keeping your table protected from spills and water marks. Give plain burlap squares a more finished look by stitching a colored border or pulling at the thread along the edges to create a fringe detail.

Mike Garten
Antique Effect Vase
Have a vase or pitcher that you’re not using? Make any vase look like an antique, with only a few supplies—including ready mix stucco patch and DryDex Spackling.
Get the tutorial at Lily Ardor »

Lily Ardor
Hand-Dyed Napkins
Bring style to any table with watercolor napkins. Once you soak napkins in water and wring out the excess, brush fabric paint in small strokes from bottom to top, diluting the paint with water as you work your way up. Hang and let dry completely before adding them to your place settings.

Mike Garten
Veggie Centerpiece
Believe it or not, cabbage can be used to decorate a vase for the spring season. Start by securing cabbage leaves around a glass jar with a rubber band. Hide the band with a ribbon before filling the vase with water and arranging flowers inside. Mix in herb greens and sturdy root vegetables, like carrots, radishes, and turnips, to add to your new veggie centerpiece. It’s an unconventional craft that’ll make a statement no matter where it’s placed.

Mike Garten
Painted Wood Serving Tray
Here’s a cool way to strike up a conversation with your guests: a handmade serving tray. After you buy paint colors that pair with your home style, start by painting a wood board (use tape to ensure straight lines). Screw on the handles, and you’re ready to serve!
Get the tutorial from Inspired by Charm »

Inspired by Charm
DIY Hanging Shelf
You can always use another shelf for functionality and this DIY small hanging shelf has many uses around the house: in a bathroom, bedroom, kitchen, or hallway above a small console table.
Get the tutorial at Alice & Lois »

Alice & Lois
Egg Coasters
Place these egg-shaped coasters on the table during your Easter celebration and keep them displayed long after the holiday ends. You’ll need replacement glass, Mod Podge, lightweight fabric, fabric scissors, and a craft or foam brush to create.
Follow these steps:
-
Make sure the glass is free of dust and lint. Cut fabric 1” larger than your glass.
-
Paint a generous amount of Mod Podge on one side of the glass. Lay it on top of the fabric and smooth out any wrinkles or air bubbles.
-
Cover your glass with a heavy book and wait several hours for your new coasters to dry.
-
Once dry, trim around the edge of the glass with fabric scissors.

Mike Garten
Wallpapered Vessels
Quite literally a trash-to-treasure craft, pretty wallpaper or wrapping paper turns empty cans into statement vessels, which can be used as vases, pencil holders, or candle holders. Just be sure to rinse out the cans and file down sharp edges first.

Mike Garten
Patterned Lampshade
Give any lampshade a personalized twist using colorful fabric and cotton twilling. Surprisingly, this fun DIY takes just six steps to complete, making it ideal for seasoned and newbie crafters alike.
Get the tutorial at The House That Lars Built »

The House That Lars Built
Cupcake Liner Wreath
A wreath as eye-catching at this one is sure to give your door some pizzazz. Here’s what you need: white cupcake liners, a white foam wreath form, acrylic paint, craft brushes, a drop cloth, and sewing pins with white tops.
Follow these steps:
-
Lay down a drop cloth on your work area.
-
Paint each cupcake liner a different color by making brush strokes on the edges of the liner. Be sure to keep the center white to get a ‘flower look.’
-
Once dry, attach your painted cupcake liners to the foam wreath form with a pin in the center and alternate colors to create a more dynamic-looking wreath. Then, get to hanging!

Mike Garten
Statement Fanny Pack
A fanny pack is not only stylish—it’s also brilliant for traveling. DIY your own using blogger Brittany’s fanny pack template. You’ll also need mini striped fabric and a sewing machine.
Get the tutorial at The House That Lars Built »

The House That Lars Built
Mini Pinch Pots
Calling all green thumbs, this one is for you. Make your own mini pots, whether you’re propagating overgrown plants or can’t stop buying new succulents. All you need is oven-bake clay in a variety of colors, glaze, and a paint brush.
Get the tutorial from A Beautiful Mess »

A Beautiful Mess
DIY Wallpaper
Bloggers Niña Williams and Cecilia Moyer used a sponge to create a custom accent wall. To recreate it at home, simply dip the straight edge of a kitchen sponge in paint, then gently press it against your wall.

Nina Williams Blog
Paper Flowers
Make these flowers now, so you can enjoy ’em all season long. To make, fold dyed cupcake liners in half and cut out petal and fringe shapes. Then fold a piece of floral wire in half and twist around the faux flower stamen. Poke the wire through the center of three to four paper liners. Finish it off by wrapping floral tape around the base of the liners and bringing it all the way down the stem.

Mike Garten
No-Sew Rag Quilt
If you’re not the sewing type, but you’d love to make a cozy quilt—this is worth a try. No sewing machine required, but bring your patience and creativity to this no-sew rag quilt project.
Get the tutorial at The Melrose Family »

Hearst Owned
Dip-Dyed Candles
Cast a custom glow with these color-blocked candles. Take plain taper candles and dip them in a mixture of colored crayon shavings and melted candle wax. Use painter’s tape for a more even dye job or embrace the unexpected and dip as you please.

Mike Garten
Entryway Organizer
Breathe new life into a dumpster-bound window frame by coating it in a striking pastel hue. Then come up with clever ways to make it functional for your everyday—adding a chalkboard for grocery lists, small hooks to hang keys, and more.

Erika Lapresto
Wood Frame
Easily update a wood frame with half-round molding and bold paint. Blogger Holly cut the trim with a hand saw—an inexpensive process she found doable with some “elbow grease.”
Get the tutorial at Club Crafted »

Club Crafted
Gold Crown
Any (and all) occasions call for a crown—at least in our eyes. Try this sunburst-inspired DIY to add a touch of sparkle and shine to your everyday look.
Get the tutorial at The House That Lars Built »

The House That Lars Built
DIY Yarn-Fringed Throw Pillow
Pillow foam filling is the basis for this fun throw pillow. Super easy to create and customize, you can make this with any color yarn to complement your home’s aesthetic.
Get the tutorial at Sugar & Cloth »

Sugar & Cloth
Wood Table Runner
Use rectangular wood pieces and yellow spray paint to create this vibrant table runner for your dinner table.
Follow these steps:
-
Lay down drop cloth outside or in a well-ventilated area.
-
Put down all the wood pieces and spray them with an even layer of yellow paint. Let them dry completely and spray another coat if needed.
-
Once the pieces are dry, arrange them on the table in the pattern you like and use them as a decorative table runner!

Mike Garten
DIY Circle Mirror
This simple mirror project has a chic, Anthropologie-like result—but it’s actually quite simple to make. Customize it in whatever shades you like, from earthy and rustic to vibrant and eye-catching.
Get the tutorial at Alice & Lois »

Alice & Lois
Graphic String Art
This easy graphic string art tutorial goes a step chicer with an ombré effect achieved by using various shades of embroidery thread. Wrap up this idea in just an hour to yield a project with a message we all need to hear right now: “relax.”
Get the tutorial at Club Crafted »

Club Crafted
Woven Vase
Woven materials, like cane webbing, are neutral in color, giving bold florals the space to shine. Cut a piece to fit around any ol’ vase, then stitch a line or cross pattern along the edges in a contrasting color of your choice. Wrap the webbing around the vase and adhere with hot glue.

Mike Garten
Floral Butterfly Frame
Refresh a simple wooden with an array of faux flowers and feather butterflies in coordinating hues. It’s an adorable craft that’ll make any family photos stand out.
Get the tutorial at Design Improvised »

Design Improvised
Nesting Desk Organizer
This craft serves a bigger purpose: Glue a set of nesting boxes to a wooden tray to keep all of your odds and ends—desk must-haves, craft supplies, and so on— in order.
Get the tutorial at Sugar & Cloth »

Sugar & Cloth
Egg Carton Flowers
It’s always the proper season for a beautiful bouquet of flowers, and these will never die! Use an old egg carton and some acrylic paint to recreate these colorful blooms.

Mike Garten
You Might Also Like