If beauty had a Michelangelo, it would be Mary Phillips. The celebrity makeup artist behind Hailey Bieber, Kendall Jenner, and Jennifer Lopez, Phillips is known for sculpting Hollywood faces with the precision of a Renaissance master. Her signature technique, underpainting (layering contour and highlighter beneath foundation) has gone viral for its ability to subtly lift and define the face without looking “done.”
Now, the-born-and-bred L.A. pro is distilling decades of editorial and red carpet expertise into her first makeup line, m.ph. The hero product? The sleek, espresso-hued Underpainting Palette, designed to decode her famous technique and make it accessible for everyday. Yes, even for beginners. “I’ve been making palettes like this for my clients for so long,” she says. “It was so cool seeing how easily they picked up on it that I was like, Wait, we could really do this.”
Tal Abudi
The sculpting palette includes everything you need to “create structure, brightness, and lift,” says Phillips: a color corrector, two highlighters, and two contour creams that mix, blend, and layer effortlessly. There’s also the dual-ended Underpainting Sculpting Brush, based on two tools she’s used her entire career. “It doesn’t have to be complicated or heavy,” Phillips insists. “It can be simple, fast, and lift your face in just a few strokes.” The formulas are sheer yet buildable, and infused with skin-care ingredients, like moisture-boosting hyaluronic acid and antioxidant-rich vitamin E—no surprise, since Phillips is also a trained esthetician. “You have to get the skin right first.”
The range also includes the Overliner Lip Pencil and Lip Ciggy hydrating lipstick, both essential ingredients for her softly sculpted aesthetic. Coming early next year: The Cheeky Cream Blush and accompanying The Cream Blush Brush, inspired by the ones she’s used most in her kit. “Everything has been tested for a very long time,” she says of crafting essentials that makeup lovers would keep returning to. “It was really important to me that it works, lasts, and works together.”
Courtesy of m.ph
Over my decade-plus of experience as a beauty editor, I’d yet to quite crack the code of everyday contouring. It always felt like it could leave me looking less like me, and more like a hyper-carved Disney villainess. But Phillips has made me a believer. Her palette now has a permanent place in my (tightly edited) makeup bag.
During a recent preview, Phillips not only did my makeup, but she walked me through each step of her finely tuned process. Below are her top tips for undetectable sculpting, sun-kissed blush, and more.
Sculpt From Beneath
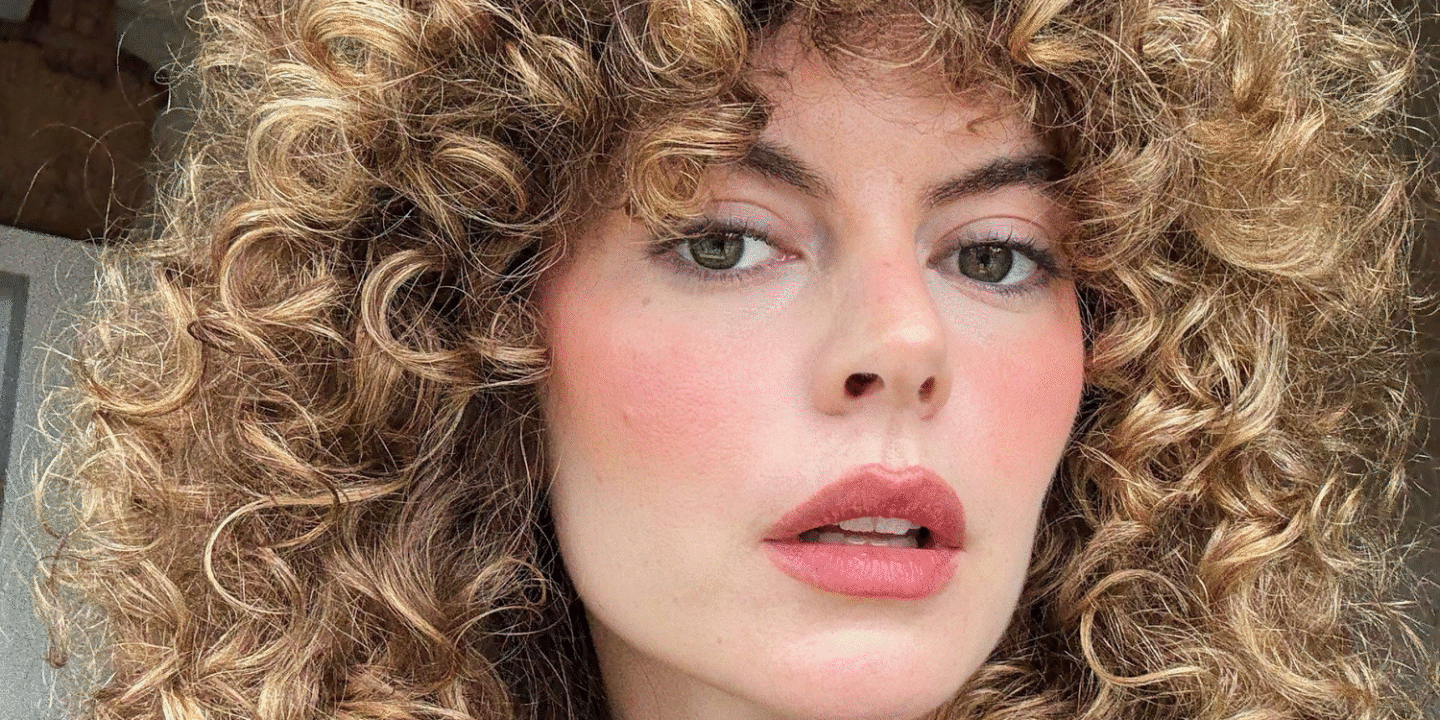
“To me, it’s like creating the bones under the skin. And then laying foundation on top is like laying the skin over,” says Phillips of her signature underpainting technique, which begins with cream contour. For her, it’s about setting the stage for a more “lifted” look. “It used to be so much carving into the cheekbone,” she adds, “and now we want to lift it up.”
Start by tapping a color corrector under the eyes to neutralize darkness. Then move on to contouring. Apply contour cream in the hollows of your cheeks, around your hairline, under your chin, and along the sides of your nose. Phillips’s pro tip? Trace the shadows your face creates in natural light to know exactly where to place it.
And remember—less is more. “People think of it as a really heavy technique, but it’s really not. Just a little bit can do a lot.” Lastly, don’t forget the eyes. “I’ll take the contour cream still on the brush and give the eyes a little bit of a cream shadow,” she says. “It adds depth and ties the face together.”
Courtesy of m.ph
Light the Face From Within
Just as she does with contour, Phillips applies highlighter under foundation to create a life-like glow. “You’re not seeing makeup on the skin—you’re just seeing the light bounce,” she says. She places highlighter where light would naturally hit: the center of the forehead, between the brows, under the eyes, down the bridge of the nose, and just beneath the cheekbones. The formula does the rest, with hyaluronic acid and luminous (never glittery) pigments working together to perfect that coveted lit-from-within effect.
Veil It All With Sheer Foundation
Now it’s time to “lay the skin on top,” as Phillips puts it, using a sheer-to-medium coverage foundation. You can also use a skin tint or add a drop of moisturizer to your foundation to sheer it out further. Using a fluffy brush, she warms up the product on the back of her hand before applying it over the contour and highlight. “It buffs everything out,” she says. “It creates a really airbrushed look.”
Conceal Sparingly, Brighten Strategically
“Just the smallest amount [of concealer] where you need it,” says Phillips. She focuses on key areas—typically under the eyes and the center of the face—to brighten and lift. A lighter tone from the palette is ideal for neutralizing darkness and subtly sculpting without heaviness.
Courtesy of m.ph
Blush High, Not Wide
To lift the face, Phillips places blush higher, rather than on the apples. “If you smile, right where your cheeks get big, start there and then blend up,” she says. She prefers a demi-matte texture—natural, not too shiny or flat—that allows the blush to radiate through the foundation.
“If you don’t powder it, it gets nice and glowy. I don’t like blushes when they get too glossy.” For a pinky, “sunburnt” effect, she suggests sweeping blush where the sun would naturally hit: across the cheeks, nose bridge, eyelids, and up toward the temples, blending into the hairline for a seamless finish.
Finish with a Softly Sculpted Lip
A defined lip helps balance and anchor the entire look. Phillips starts by softly contouring the lips. Using the smaller side of her dual-ended brush, she applies a cool contour cream just above the Cupid’s bow and beneath the bottom lip. To enhance the effect, she sometimes layers a bit of highlighter beneath the contour.
Courtesy of m.ph
When lining, she begins slightly inside the corners and gradually overlines as she moves toward the Cupid’s bow, lifting the lip shape subtly. She overlines the bow “by a hair,” then starts at the center of the bottom lip and works outward, again staying just inside the corners. A lip brush can help diffuse the edges for a natural finish.
Her lip formula? Hydrating, forgiving, and packed with pigment. “It’s like a tinted balm, but it has a lot of color in it,” she says.